
Flexographic printing is everywhere today. You can see examples of it on candy wrappers and bags, snack bags, cereal packaging, bread bags, plastic shampoo bottles, biohazard specimen bags, and even on the outer packaging of bath tissue and paper towels.
It might seem like magic, but the series of complex steps involved in flexographic printing are best explained as a carefully choreographed science meets art; yielding a final printed product that is both pleasing to the consumers eye and functional.
- ARTWORK
The first step in any flexographic printing project is designing your artwork. Creating a design that fits the specifications needed to produce the final desired print results is always challenging. The genesis to every successful flexographic job begins with thorough and well thought out pre-press work.
Printing plates used in flexographic printing are typically made from photopolymer material. Photopolymer plates are excellent at precisely transferring inks to the substrate and the ultimate creation of a sharp and distinctive image.
When mounted to a print sleeve, printing plates create flat stretch which would slightly distort the image. This distortion is calculated and compensated for in the initial pre-press.
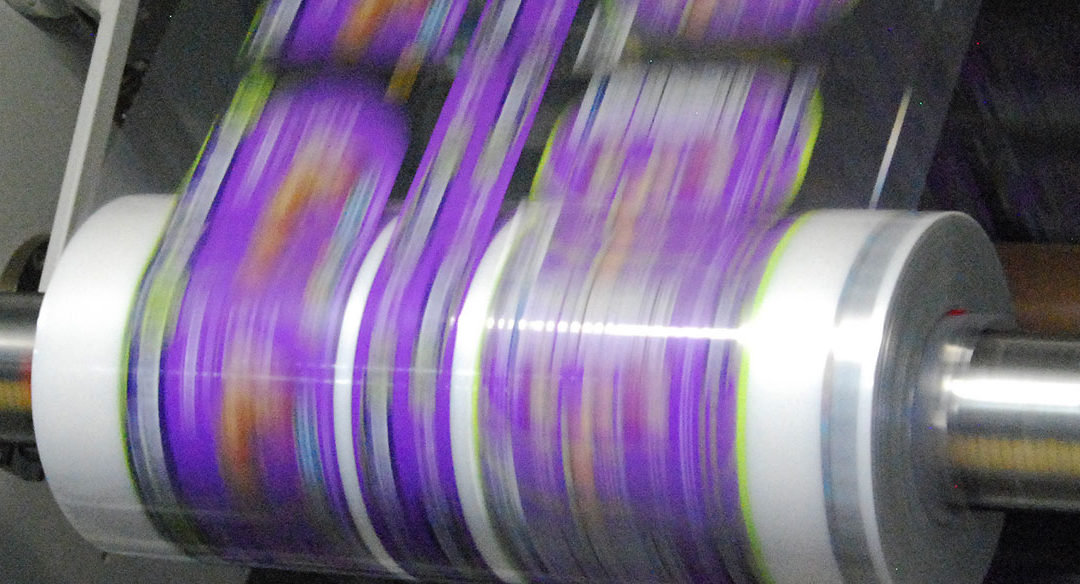
- WEB-FED SUBSTRATE MATERIALS
The continuous rolling design of the flexographic printing press allows for continuous substrate materials (in roll-form) to be fed through the machine.
This feature of flexography is what allows for the continuous roll to roll printing process which can achieve high speeds, while maintaining extraordinary print accuracy, color consistency and efficiently produce large print runs.
- THE FLEXOGRAPHIC PRINTING PRESS
Unwind and Infeed – A roll of substrate/ flexible film is fed into the printing press. Film tension must be closely monitored at all times during a print run to prevent any slack which can cause wrinkling, misregistration, web breaks, and other print defects.
Enclosed Doctor Blade Inking System – A continuous cycling pump fills the enclosed chamber with ink. The ink is transferred onto the anilox roll with any excess removed by the doctor blade. The ink cycles in and out of the enclosed system during printing.
Inking Anilox Roller – Each anilox roller contains microscopic cells which carry a thin layer of ink from the inking system to the printing plates.
Printing Plates and Sleeves – The printing plates transfer the image to the substrate.
The flexographic press pulls the substrate between the print plates which are mounted on the sleeves . Simultaneously, the sleeves hold exactly the right amount of pressure on the substrate for even ink distribution.
Drying – The substrate winds through a heat tunnel which dries the inks.
Outfeed and Rewind – The final step on a flexographic printing press is the outfeed and rewind where the printed substrate is rolled up again in preparation for the next steps.
Carroll Products, Inc. utilizes 8-color state-of-the-art flexography printing presses, PMS color matching system, on-press barcode scanning and cutting-edge pre-press technologies to help make your packaging stand out from the crowd. Contact us today to see how we can help with your next project.
Recent Comments